Well, it’s been a long time since I’ve posted and an even longer time since I’ve posted a tutorial! For me, planning tutorials isn’t really the difficult, I have a list of them that I want to post, it’s the actual part of putting them together that I’ve been ignoring. I’m really hoping to grab the reins on this blog and put more energy and effort into making it a one-stop for all sorts of news, information, and resources so this is my attempt at kick-starting it again!
One of the tutorials I’ve been asked for the most is one on expansions, making an image much larger than what is captured in camera. This technique is sometimes referred to as the “Brenizer Effect”. First off let me just say that there are countless tutorials, videos and resources to give you an even better understanding on how to expand your frame. I’ll list a few links I’ve found at the end of this post.

Let’s get started!
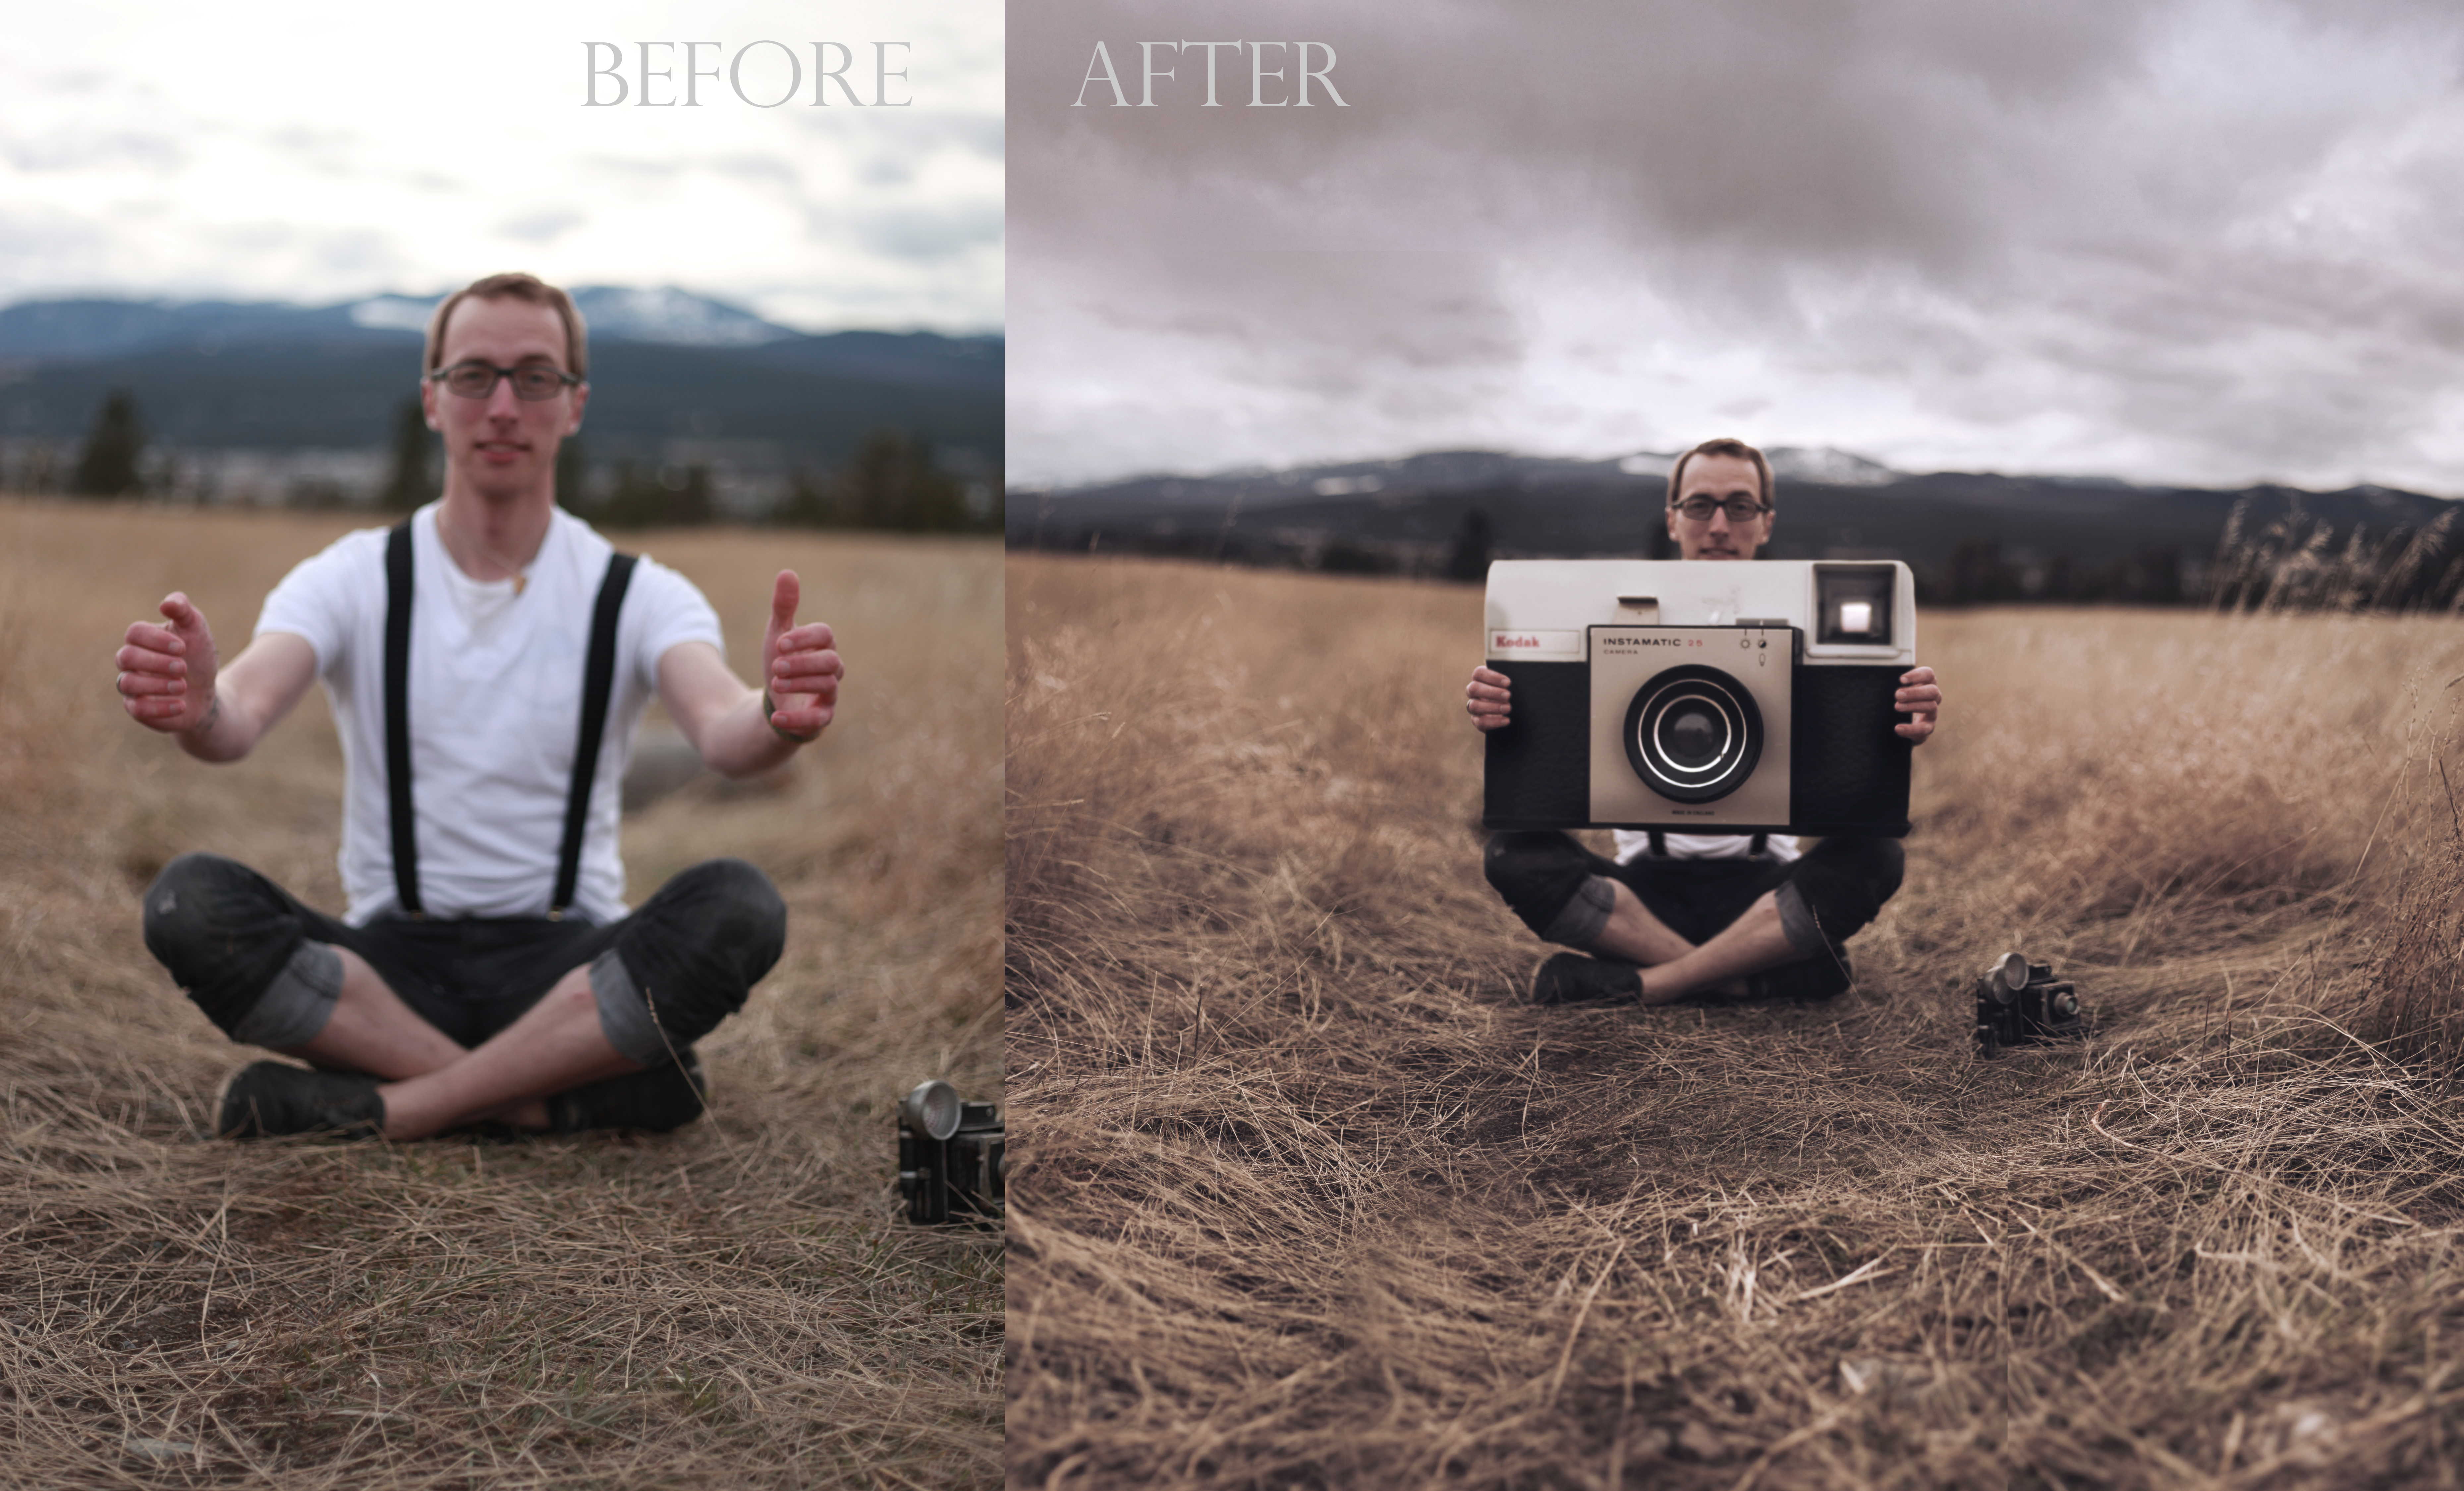
So the first thing to consider when you’re expanding your frame is make sure that you have all the images that you need to do so. You can expand your frame from just a single photo but it’s really tough and takes a considerable amount of time. When you’re shooting your photo, whether it’s a self-portrait, a portrait of someone else or even a landscape or still life photo, take in as much of the surrounding backdrop as you can. Typically what I do when I shoot is I take the “main” image and then I switch over the focus to manual focus and then I take photos of the background, moving in clockwise pattern from right to left. I usually take more photos than I think I’ll need, just to make sure that I have what I need to work with. For the photo below, I actually had 15 images but only ended up using about 8 of them in the final photo.
Once you have your images, the fun starts!
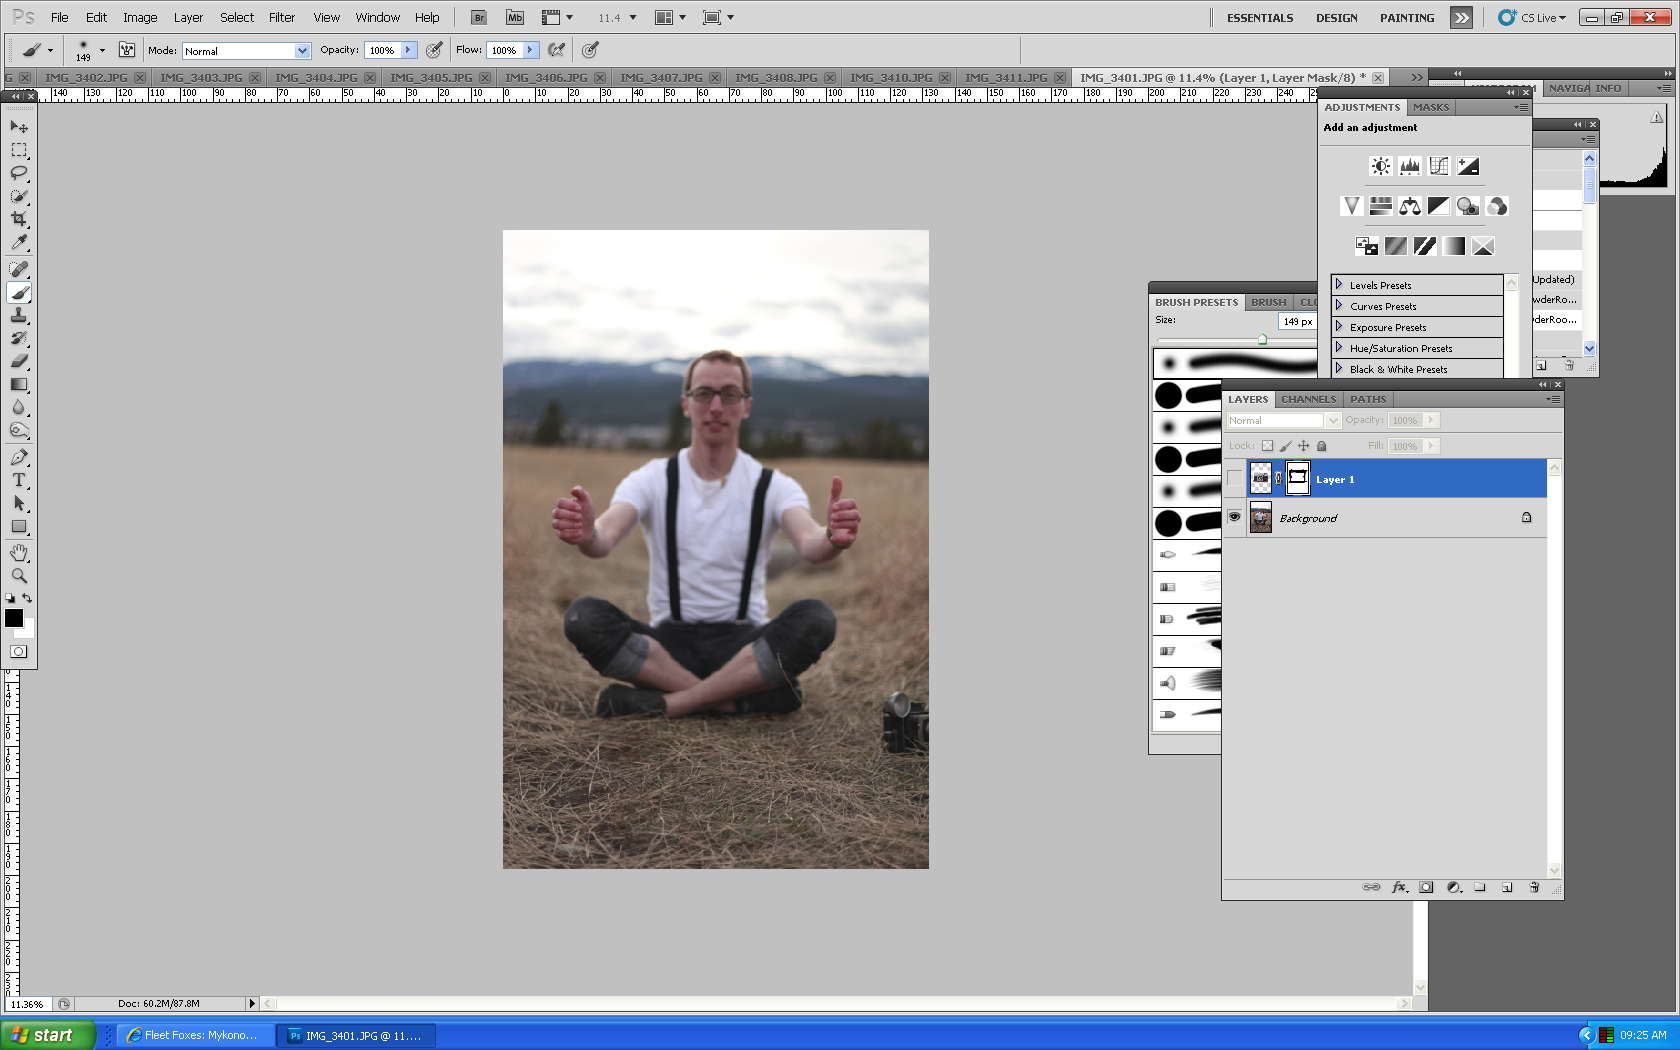
Step 1:
Open up all your images in Photoshop and then open to your “main” image. Here is my first image, what we’ll call the “main” image.

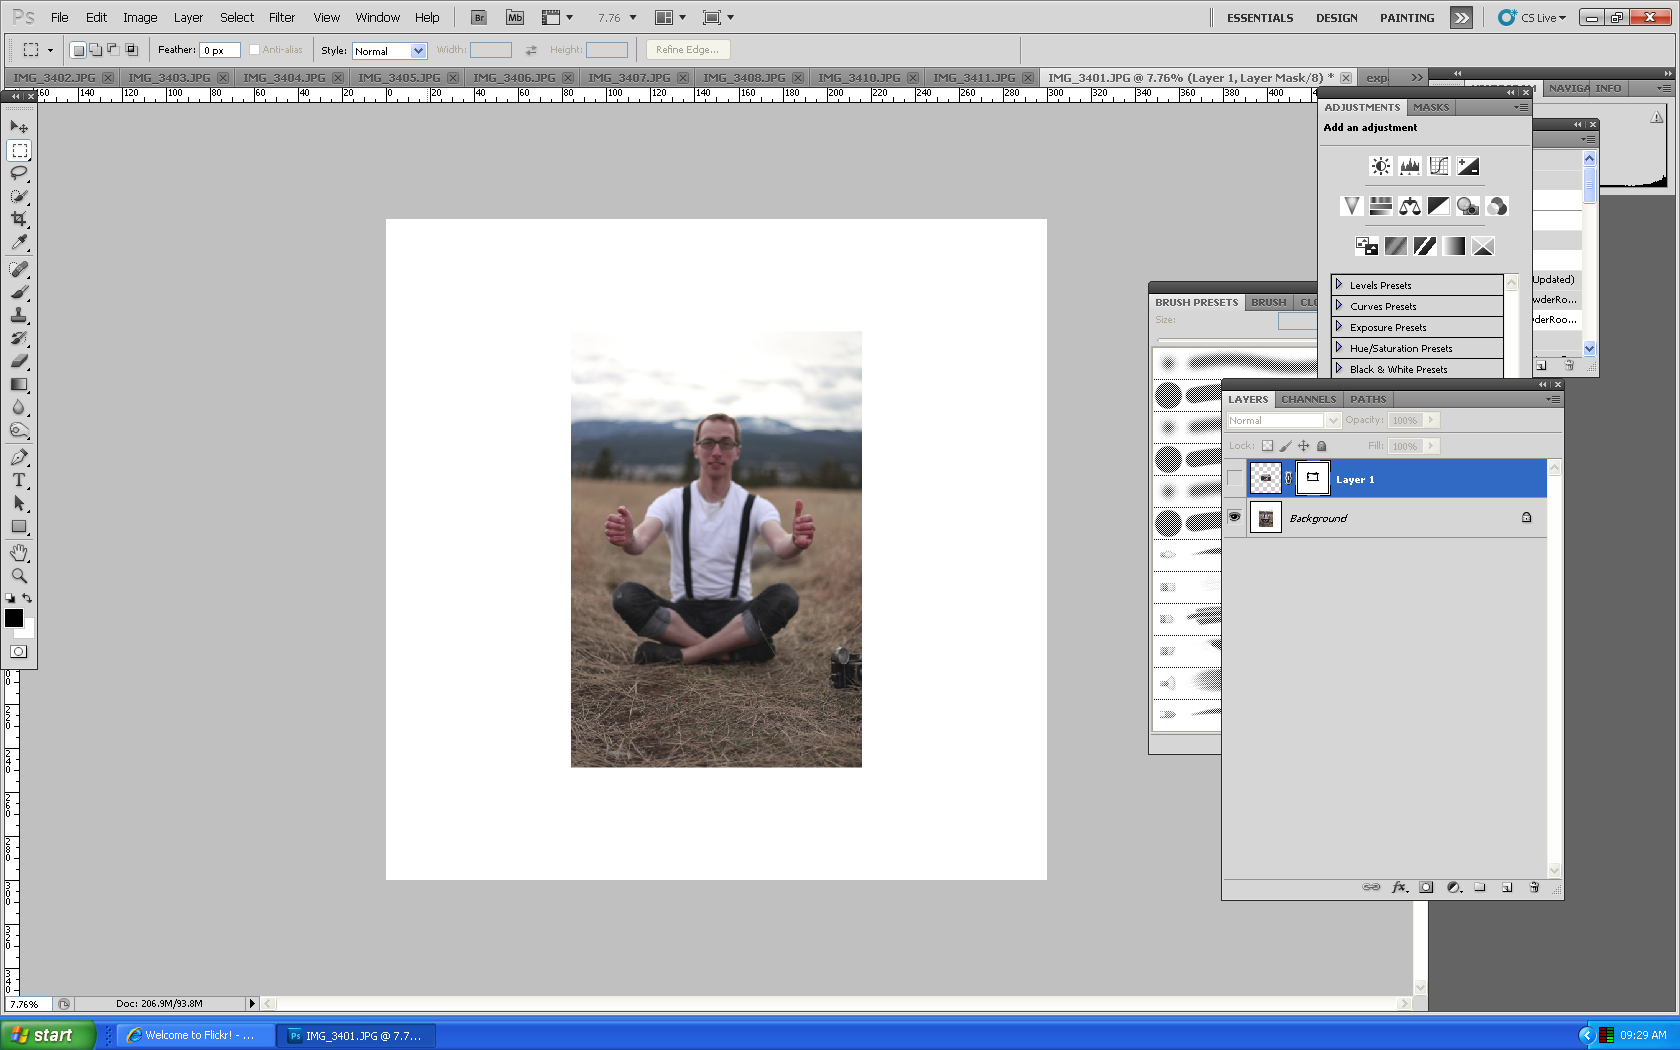
Step 2:
Expand your canvas size by clicking Image —> Canvas Size. This part is totally up to you and depends on how big you want your final image to be, if you have a large scene to expand you’ll want to expand your canvas quite large. I typically start with a canvas of 300cm by 300cm (which is pretty big) but then you can always crop or expand wider if you need.


Step 3:
Once your canvas is widened, now you can start to add your new layers. It doesn’t really matter where you start, but I usually start with the images that are closest to the “main” image.
Go to one of your other images (in this case the image that will fill in the immediate left of me) and select/copy it. In your main image, paste this new image into a new layer over top. Now line up this layer to match where it fits the image below, you might need to lower the opacity a bit to be able to see behind it and line it up.
Step 4: Masking
In Photoshop, apply a layer mask over this second layer.

Then making sure you have black as your paintbrush colour and a large soft brush, paint over the hard edge of this layer in the mask mode. You should start to see your main image appear. Paint over anything that you want to get rid of and don’t worry if you paint over too much, you can make it reappear by painting it back with a white brush.
Step 5:
Repeat steps 3 & 4 with all the other images you need to fill in your background. You can automate Photoshop to stitch your images together but I find that doing it manually helps you to create the image from scratch and see the final image being created.
As you add in and mask all your layers, you can either expand your canvas again to bring more space into the image or you can crop it. In my photo , I just left it as 300cm by 300cm. This is 6 layers which only took about 5 minutes to add in and mask.
That’s really all that it takes to expand your frame! This was a fairly simple image to work with but here are some tips for successful expansions!
– remember your focus! – always make sure that you lock your focus into manual mode so that all your images have the same focal point, this is key to creating a seamless expansion
– lighting/shadows – If you’re expanding in a space where the lighting is changing or you need shadows, remember to set up your additional images to capture that. In photos where I’ve been in my living room with a wall behind me, I’ve taken the main shot, then moved the camera and taken another shot with me in the same position to make sure that the shadow remains intact
– busy backgrounds – The more neutral the background the easier your expansion will be, keep in mind that backdrops like tiled floors, wallpaper, bricks and tiny twigs and branches can be difficult to line up when you’re adding them to your main image, it’s doable but will take a bit more time.
– gaps – sometimes even if you take a lot of photos you might end up with a few gaps in your stitching, if this happens you can just clone in some of the nearby background into these gaps. In the photo above, I had a few spots in the grass that I had missed while taking my photos so I just cloned in some surrounding grass and this helped to cover up any white space.
Here are a few links including a vide on how to automate this effect:
http://blog.buiphotos.com/2009/07/the-brenizer-method-explained-with-directions/
http://www.ryanbrenizer.com/2011/05/brenizer-method-instructions/
I hope that this tutorial helps explain this technique and that if you haven’t already tried expanding you frame, that you’ll try it out!
See you again soon!


Thank you so much!
spent like 2 hours on this shit last time trying to figure it out and here you are telling me it can be done in 5 mins???? UGHHHHh Joel!!! I needed you like a month ago on this =) THANK YOU for saving me time in the future.
Thank you SO MUCH for mentioning layer masks. I see tutorials like this, and they almost always say to use the eraser. It makes me want to scream.
great tutorial. I like especially this part: In photos where I’ve been in my living room with a wall behind me, I’ve taken the main shot, then moved the camera and taken another shot with me in the same position to make sure that the shadow remains intact.
I should have thought about it when i tried to do a expansion!
awesome tutorial, looking forward to trying it sometime
Your teaching is as great as your photography, thank you!
Great tutorial and thanks for the additional links!
Hi Joel, maybe it will sound stupid but I am still confused about how exactly all the additional photos are taken. You need to mount the camera on the tripod and move it up, down, right and left after you take the photo of the main subject? Wouldn’t e.g. moving the camera downwards to photograph the foreground distort the perspective? And what if you want a lot more background? Or do you actually take the camera and physically step back with it? For example, in this photo from Brad Wagner (hope I can use links here): http://www.flickr.com/photos/iambradical/6703094637/ He is perfectly sharp and in focus but if the picture of himself alone was almost filling up a single frame, it means that to get all the additional landscape in, the camera had to be moved from its original spot, right? I am sorry for the idiotic way I’ve written this but tried to express it the best way to make clear what I struggle with :). Hope you’ll have time to answer. By the way, you re one of the rare people on flickr who have huge amounts of photos that all reach very high quality and originality. Admirable :).
[…] http://joelrobisonphoto.wordpress.com/2012/04/13/an-expansion-tutorial/ ) […]
[…] […]
Hey Joel, Great tutorial.
Can’t wait to try it out
cheers
Hey Joel, this tutorial makes it all look so easy, but I’m confused about the extra pictures.
Do you take them from the same spot as you take the original, and just aim the camera in the other directions?
Or do you physically move the whole tripod and camera so that it is aimed straight ahead like the original?
Thank you
[…] The first thing I always do is open up my blank scene photos and expand them (if you’re not doing an expansion, skip this part!) I usually include a layer using my stand in, just in case I need to use the shadows later on. If you’re not familiar with how expansions work, I do have a tutorial here that explains it! http://joelrobisonphoto.wordpress.com/2012/04/13/an-expansion-tutorial/ […]
Reblogged this on Siyana Kasabova Photography and commented:
awesome!
wow thank you, this has helped so much. This is great!
Hey Joel! I used your expansion tutorial and created this out of about 8 photos (only ended up using 4 plus the clone tool). I’d love if you’d take a look sometime. Thanks for sharing your expertise!
http://www.flickr.com/photos/89679812@N06/9368082830/
[…] The first few shots I took were of the “scene” or the hat/books/teacups resting on the wooden bench thing in the grass. I used my 85mm lens at ISO 50, 1/400, and 1.4. The sun was still bright enough that I didn’t need to bump up the ISO and since the colours in the sky were so vibrant I wanted to keep it fairly dark to catch the tones. The main image ended up being an expanded shot of about 25 images, combined to create one canvas. You can read a tutorial on expansion here if you’re not sure what that is or why I do it. https://www.joelrobison.com/index.php/an-expansion-tutorial/ […]